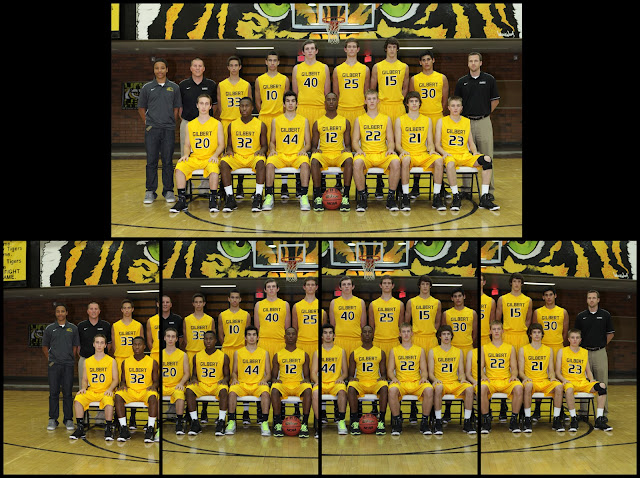
This team photo of Gilbert High School's 2012-2013 Varsity Basketball team is a compilation of 4 separate images. I shot 4 portrait (vertical) images and merged them together in Adobe Photoshop using the photomerge feature.
This first picture is the final result of the Photomerge.
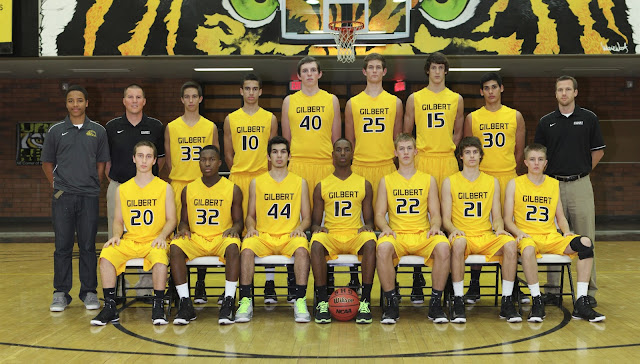
I was trying to find a way to get a file with more pixels and therefore good detail for large prints. I decided to experiment with merging multiple files together. The images I used here are handheld and were shot quickly so the players didn't have much time to move.
There are some things to remember when shooting the images for the Photomerge. Shoot all the images along the same plane (a leveled tripod can help with this). Don’t change your focal length. Compose using your zoom and leave it at the same focal length for all the images. Overlap the images so Photoshop can align the images properly.
In CS5 Photomerge is found under File | Automate | Photomerge |
For your first try select source files. Set layout to Auto. Check the “Blend Images Together”, “Vignette Removal”, and “Geometric Distortion Correction” options. It should give you fairly good results.
The results will display in a new image. You will see some white space around the edges. A simple crop is all that is needed to clean it up. It's as easy as that. Have fun experimenting with it.
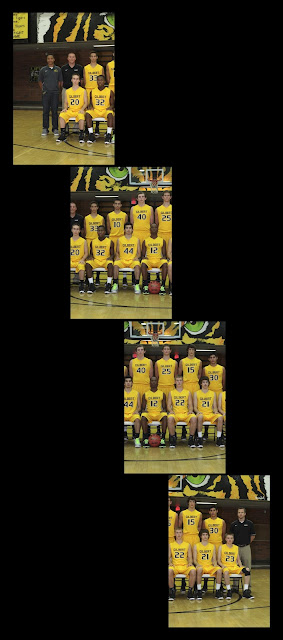
The picture below is the final again along with the 4 images I used.
You can see the overlap. Its important for photoshop to have sufficient overlap to align the images.
This last image shows the overlap better.
Nothing scientific about the overlap. I just guessed. I read (after I did this) that 40% overlap is a good to shoot for. My overlap varied and was probably a little more than 40%.
This works very well with outdoor landscape images. Have fun with it.
